Showing posts with label birthday. Show all posts

Friday, March 1

Mason's Camping Party


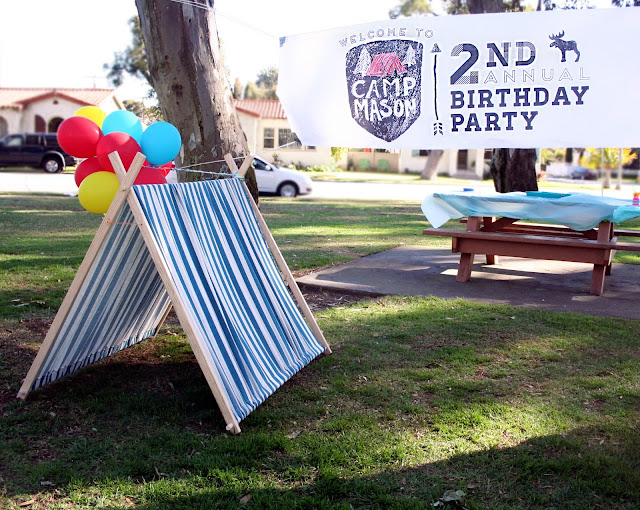
There you have it Mason's fun little camping party! We did everything ourselves (with help from our families). My dad made the tent following this tutorial. Instead of a cake I made S'mores cupcakes, inspired by this pin. The party favor was inspired by this pin. I bought the flashlights here. The 8ft banner and large bear poster were surprisingly affordable ($15 for both). I had them printed on a large format plotter in black and white (what they print blueprints on) and colored in the tent with crayons. I found the red wrapping paper that's covering the boxes on the table at Target, on Clearance for $2 right after Christmas (it kind of was the jumping off point for this party). My mom brought salad and fruit, and I made all the goodies with help from my mother-in-law. The s'more pops were a huge hit (inspired by this pin)! Instead of using the normal jumbo marshmallows, I used the GIGANTIC ones and they were absolutely delicious (make some, you won't be sorry). For entertainment we had bubbles and balls for the kids to play with, and the adults chatted and played a frisbee game called can jam. I love how it all turned out, it was casual, fun, and pretty low stress. I hope this inspires you for your next party!

**UPDATE** THE INVITATION, BEAR POSTER, AND PARTY BANNER ARE NOW AVAILABLE ON ETSY!

Friday, February 22

Camping Party Invitation


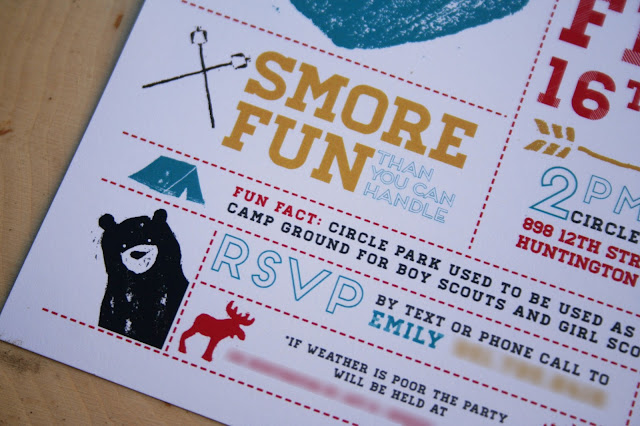
So if you follow Design Fancy you know I love to throw parties! Actually I love any excuse to design an invitation, and Mason's second birthday was the perfect excuse! If you haven't noticed, my last name is camp and that is what I went with for the theme, a camping party. I was going for less campfires and tin foil dinners, and more for a retro summer camp sort of a feel.


More often than not, my design process becomes experimental. I knew I wanted there to be a crest sort of shape that acted a sort of the summer camp logo. I also knew I wanted it to look stamped and retro. I don't generally like when something is faux stamped in photoshop or illustrator, you can usually tell. I also knew that I could not afford to purchase custom rubber stamps (I looked into it, it would have been pretty pricey). While I was racking my brain to try and figure out how to achieve this look, I remembered an art project I did with kids while working in an after school program in Idaho. Styrofoam Printmaking! Have you heard of it, or tried it before? Google it! I have done it before, but didn't think of it as a serious art form. People, it is! Basically all you do is gouge into a styrofoam plate with a ball point pen or some other pointy tool, paint over it and press it on paper. You can create some pretty sweet stuff with this technique! The possibilities are endless. I'll share more about the process next week.


So back to the invitation...My sister and I stayed up real late one night gouging and painting different shapes on plates (thanks Lollie), then I scanned them in and added the type. All the fun shapes started out on a styrofoam plate.


I love how it turned out! It's bright and fun, but not babyish. It was the perfect intro to his fun little party! Check back in next week for more party details (the party favors were real cute) and more on styrofoam printmaking.


P.S. If you think you would like this for your own party leave a comment. If I get enough interest I'll create a version for my etsy shop.