Monday, October 29

Adding "JOY" to Your Home


Hello friends! are you ready for Halloween? I been busy making a few Halloween and Christmas projects and I thought I would offer them to you as well!


Aren't these so cute? Have you seen any string art on pinterest lately? I thought it was such a cool and simple idea so I created a few patterns myself. I decided to mix the sting art with vinyl and painted graphics as well.


So do you want to add a little "JOY" to your home? Not only are they great decor for your own home, but they would make great gifts as well! Contact me if you would like one of the designs above or something COMPLETELY CUSTOM, like a name or an initial or maybe a thanksgiving turkey, or something you dream up yourself. I can create just about anything with nails and string! You can pick the size and color of your board as well as the colors of the embroidery floss.

Think you'd like to create one yourself but don't really know where to start? I am also selling the patterns for the projects seen above, I can also create you a custom pattern for you to print and use to create your own board.

If you are interested in pricing for any of these or something custom, please leave a comment below and include your email. You can also contact me directly through my email listed at the top of the blog.

Friday, March 2

Just Wondering...


Thank goodness it's Friday! Do you ever have those weeks where you just feel blah? I do, and this week was one of them! What do you do to end the blah? Any suggestions?

One thing I did do this week was make a poster for a Relief Society birthday activity, hence the cupcake.

Thursday, March 1

I Won


Happy Thursday! Like my new scarf? I won it from Lucky Magazine! I never win things so when I got the email saying I won, I was a little skeptical. Then I received this little gem in the mail! I was ecstatic! I absolutely love scarves, and I love the colors and the length of this one! It's from Bindya. Check them out, they have some gorgeous prints!

Tuesday, February 28

Nautical Party Details


Ok, I promise this is the last day I will share anything from Mason's party! I just wanted to show you a few of the details from the day, Starting with the centerpiece!


My mom made the centerpiece from tissue paper, Swedish Fish, and Easter grass. Really simple, but really cute right?


We hung an  oversized tag that matched the thank you treats (see below) using the watercolor background from the invitation. My mom also created the life preservers in the windows.


On the mantle we had an awesome bunting created by my mother in law, sailboats that my mom and sister made, and then we enlarged a portion of the invitation and framed it.


I love how the bunting turned out! She created the stripes herself with bias tape!


My mother in law also created the bunting over the island.


I found REALLY cheap stickers (1 cent for 4 stickers) so I printed a little thank you on them. I filled cellophane bags with Swedish Fish and sealed them with the stickers.


One thing we didn't get pictures of was the diaster of a cake! I baked and filled a 4 layer cake and my little sister was going to make it all cute and cover it in fondant. We have no idea why, but while she was decorating the cake split directly down the middle! It was atrocious, but it was tasty! 

Monday, February 27

Nautical Birthday Invitation DIY


Happy Monday friends! How was your weekend? Ours was lazy, but it was great! Today II am finally sharing Mason's 1st birthday invitation with you, as well as how to create the same obre effect yourself.

For me, the basis of any good party is the invitation. It should set the overall tone for the event and give your guests a little sneak peek of what's to come! I knew from the beginning I wanted some sort of ombre effect on the card. First I tried painting different shades of blue, but since I don't know how to watercolor, it didn't turn out so fabulous (see below).


That's when I saw this post from Say Yes to Hoboken on how to dip dye tags, I thought it would be a great way to get the effect I was looking to achieve on the invitation. I, however, had to change some things up from her tutorial because: 1. I didn't have dye of any sort and I wasn't going to buy any, and 2. I didn't have a can/ cup/ vase or anything tall enough and wide enough to dip the 5x7" invitation. Below is my take on the dip dying process.

You will need:

A large enough baking dish to fit your paper, watercolors (not the dry kiddie kind), a paint brush watercolor paper, a rag, and of course water. (ignore the heart cookie cutters that was for another project).


Mix up your color in the baking dish with the water. Pour in enough water so it's about 1/4" deep. Add more paint depending on how dark you want your paper to get (you can also add more later if it isn't dark enough). Mix the paint with a paint bush to make sure there are no globs of paint on the bottom on the dish.


You will create the lightest color first. Dip your paper to the point where you want the color to start and giggle slightly to avoid a harsh line. Leave it in for just a few seconds and pull it out of the water. If it is the color you desire the dab the bottom on the rag to collect any pooling color and let it sit to dry. If you want that section darker, then put in back in the color for a few more seconds and let it dry.
When it's completely dry repete the process, but don't dip the paper in as far. This time leave the paper in the color a little longer. Continue this process till you have all the layers of color you desire. ** be sure to mix the color with your bush before each layer to avoid the globs of color on the bottom of the dish. If you don't you will end up with very thick, uneven layers of paint.


This is what my paper looked like when I was half done. Notice the little dark spots on the side? Those are globs that I missed!

That is you can dip dye an invitation!


I know what you are going to ask me, "You dip dyed every invitation?" No I did not! I dip dyed 1 invitation and scanned it in. I also painted a few sailboats to scan in so I wouldn't ruin my dip dying. After I scanned everything, I placed the in Photoshop and added my text. 


What do you think? Will you try the dip dying effect on any of your projects?

**UPDATE- TO PURCHASE THE NAUTICAL INVITATION CLICK HERE!**

Tuesday, February 21

The Big 0-1


So Mason had an awesome party in California on Saturday. In fact, it was so great we decided to stay for the week! I thought today I would share a few pictures of him from his party and give you a little Mason update and then next week I'll be sure to share all the party details (there will even be a little DIY for you).


Mason is now one and is such a joy! He is way too much fun. He loves to walk now, open drawers and pull EVERYTHING out, take walks, watch Yo Gabba Gabba, and he likes to make us laugh. His new thing is spitting while he has food in his mouth, which he thinks is hilarious! It kind of is


Until his party we hadn't given Mason any sugar, and I think it is easy to see how he feels about it now!


Want some?


Mason loved opening presents and got some pretty sweet stuff!


He received a  ton of books (which I am really excited about) including a quiet book from Auntie Lollie. Cool right?


Mason also discovered his new found love for sword fighting. I am just praying that this doesn't turn into a "thing."
I hope your weekend was fun like ours and I hope this week is even better! See you next Monday!

Friday, February 17

Mason's Party Sneak Peek


Hello friends. Today I'm getting ready for Mason's 1st birthday so I thought I share a little something from his party. I found cheap little anchor charms and thought it would be cute to add them to the invitation so I went with a nautical theme. I did not, however, end up using the charms.
Next week I'll show you all the little details and a DIY for you! Hope your weekend is awesome! bye.

Thursday, February 16

Confession #4


No, I am not Tyra Banks' biggest fan, that's not what this confession is about!
I saw my first runway show when I was 5 or 6. I loved it! After that I decided I was going to be a model when I grew up. Yup, that was my goal when I was 6, to be a tall, skinny, beautiful model. Well, in Mrs. Tada's 1st grade class we drew little pictures and made a chart of what everyone wanted to be we grew up. There was a long row for teachers, firemen, and I'm sure there were a few astronauts. It was my turn to walk up and stick my picture on the chart.  I proudly put my picture on the chart and as I said "When I grow up I want to be a model" the class started laughing! Laughing, can you believe it? I didn't get it, why were they laughing? I didn't let it get me down. I was even more determined to to become a model after that. As you can tell I achieved my dream. I am a famous, tall, skinny, and utterly gorgeous model. Don't laugh!

What did you want to be when you grew up?

original image via

Tuesday, February 14

Happy Valentine's Day


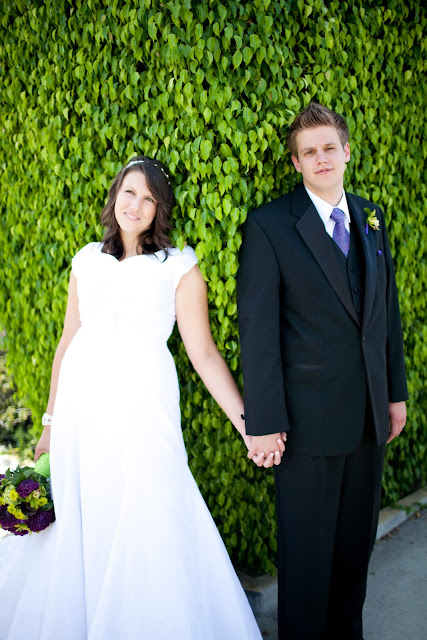
Happy Valentine's Day (hopefully it's happy)! Here's a little pic from our wedding day, don't we look so young and in love! This is our 4th Valentine's Day together and the for the first time we will be spending it out on the town! Every year before this we've had a pizza picnic in the living room, which is our favorite date together. This time we're leavin' the kiddie at home (with a babysitter of course) and painting the town red!

I thought it might be fun to share some "mood music" this V-day. Feeling lonely? Don't worry I created a special playlist for all you single gals out there too! FYI: I love 80's and 90's Love Ballads! Follow the links below to the appropriate playlist!


picture taken by Denise Bovee

Monday, February 13

"Love is Sweet" Banner Download


*UPDATE: LINK HAS BEEN REPAIRED SO YOU CAN NOW DOWNLOAD THE BANNER

Why hello there! How was your weekend?  We threw a little Valentine's shin dig. It was quite fun! This week we are getting ready for Mason's first birthday party! I can not believe it's been a whole year! I should also throw in the fact that he is a walker now (of 3 days) and we have locked up taped up all our kitchen drawers and cupboards (classy right?). Enough of my bragging.


For our party I created this happy banner to hang above the dessert table. Cute right? Do you want one?
I've decided to turn it into a DIY project for you. I will now try and explain how I did it.


I first placed each letter in Adobe Illustrator and reversed them so when they were cut out I could turn them over and not see any lines. I printed them on water color paper that I had laying around and then ON THE BACK did a few swipes of pink water color across the whole page, leaving so white areas. When that dried I went over some of the areas with red. To add some other textures I added salt to the wet water color (it leaves little dots when the paint is dry). I brushed off the salt, cut out the letters, and stapled the to a piece of yarn. The end. It was that easy!


So do you want to make one? CLICK HERE to download the letters. You can print them on any type of paper and do whatever your heart desires to them! You could use markers, colored pencils, or print them on patterned paper. This would also be a fun project to do with kids!

Have a delightful day and check back tomorrow for another Valentine's surprise!

Thursday, February 9

Confession #3


I love cold cereal! If I could only eat 1 thing for the rest of my life it would be cereal! Lately I've been on a low- carb diet and all I have been craving is a giant bowl of Fruit Loops, or Frosted Flakes with red grapes! Yum. Do you like other things in your cereal? I prefer my cereal with a load of fruit in it (bananas, strawberries, grapes, they're all good). Ok, so come clean, what food can't you live without?

original image via

Wednesday, February 8

Bye Bye Helmet Hair


See this beautiful face? Well this beautiful face will no longer be sporting that awesome helmet as of this afternoon! WOO HOO! We might need to celebrate with a haircut (he looks like Baby Bieber without the helmet on). Have a fantastic day!

Tuesday, February 7

Monday, February 6

Lips and 'Staches


*UPDATE: LINK HAS BEEN REPAIRED SO YOU CAN NOW DOWNLOAD THE LIPS AND 'STACHES
I wish I could say that this was all my idea, because if it was I'd be a genius! How cute are these? I saw these lips and 'staches when I was working in an elementary school in 2010 on Family Fun and thought they would be so cute to give the kids.


Well they were a big hit! The kids were walking around with giant mustaches and big lips all day! These are still one of my favorite valentines so I thought I would share my template with you so you can make them yourself! To download CLICK THE BUTTON BELOW


To make them just print the template on whatever color you desire, cut them out and stick a sucker in the middle. Easy peasy! If you make them I would love to see pictures, so please share!

FOR THE LIPS:

FOR THE MUSTACHES: